1. Install KCM
Start for free in minutes. Upgrade to a licensed deployment whenever you’re ready.
Install free version
The Community build unlocks topic management, consumer monitoring, Kafka Connect, Schema Registry, and ACL tooling at no cost. For the fastest start, use Docker Compose (see Quickstart).
Docker Compose (recommended)
- Clone the repository and enter the Docker example directory:
git clone https://github.com/kcmhub/KCM.git cd KCM/00_kcm_with_docker_compose - Create the shared Docker network:
docker network create kcm-net - Start the services:
docker compose up -d
This brings the full demo environment online at http://localhost.
Pay & install license
Upgrade to Pro to unlock multi-cluster management, unlimited users, advanced diagnostics, and enterprise integrations.
- Go to the pricing page and click Subscribe.
- Once payment is confirmed, you’ll receive an email with your license key (and customer portal details).
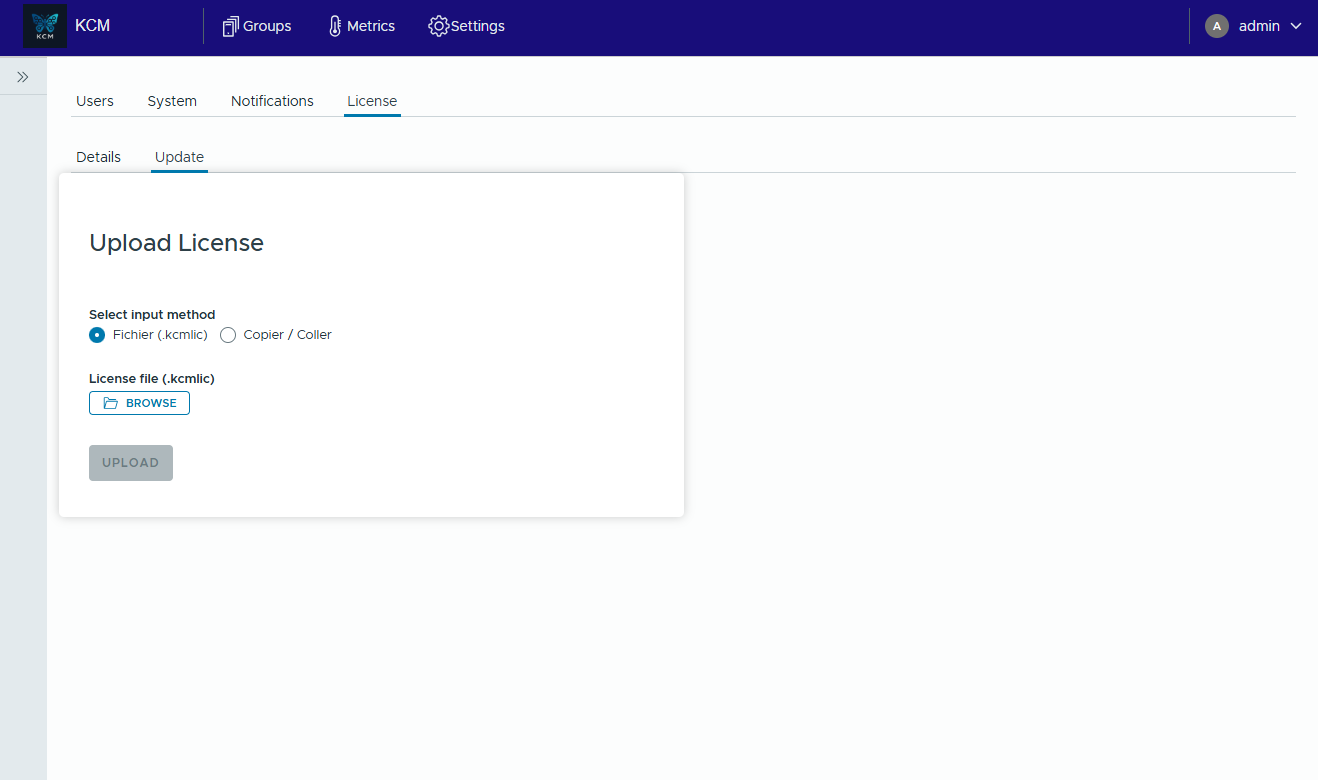
- In the KCM web console, open Settings > License, then go to the Update tab.
- Select your preferred input method:
- File: choose the license file and press Upload.
- Copy / Paste: paste the raw license token if file uploads are blocked.
- KCM validates the signature and enables premium modules automatically. Confirm the status shows “Pro”.
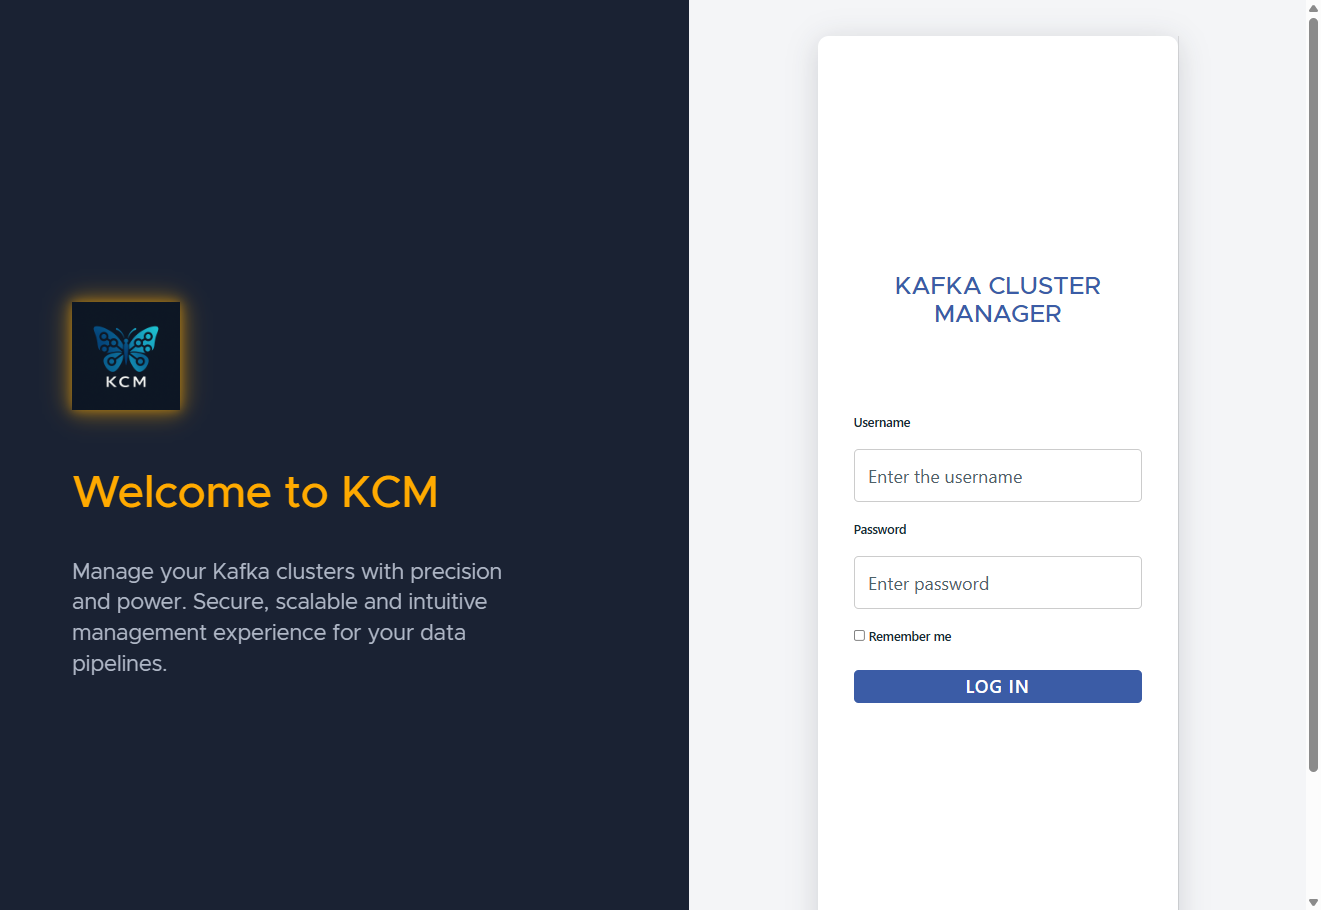
After installing KCM, sign in with your administrator credentials to continue configuration.
2. Connect your Kafka clusters
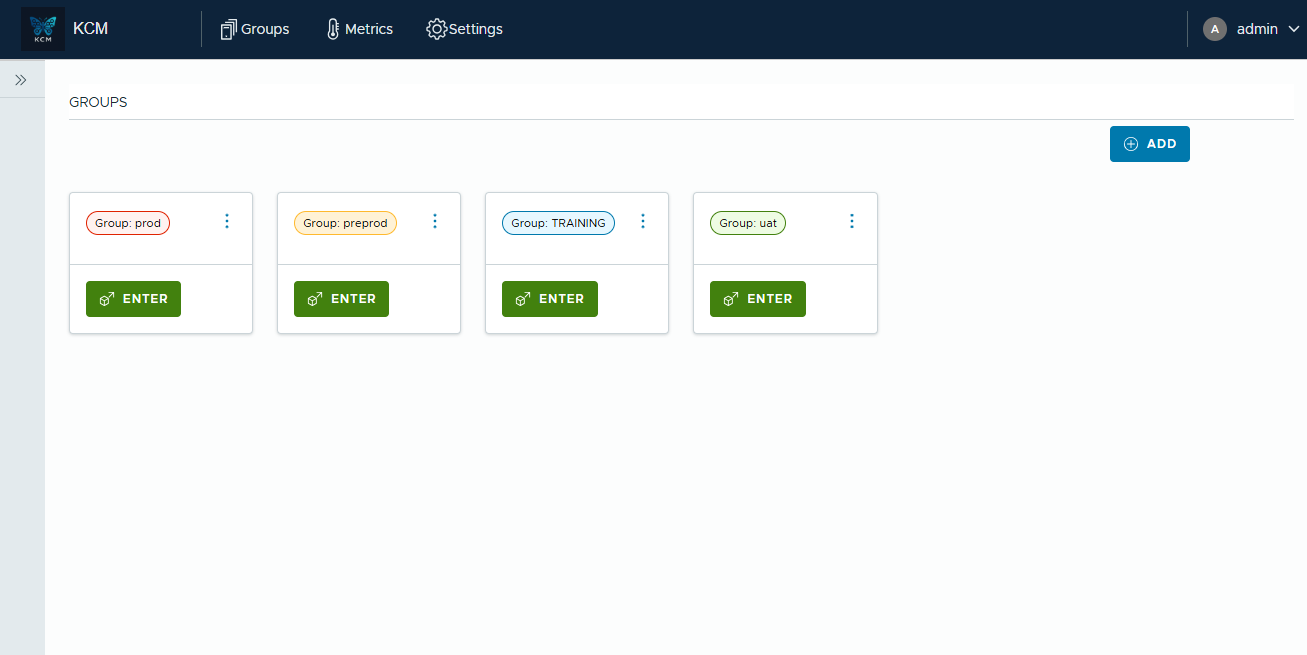
Create a group
Organize environments into groups (prod/stage/regions). This keeps operational contexts separated while using a single control plane.
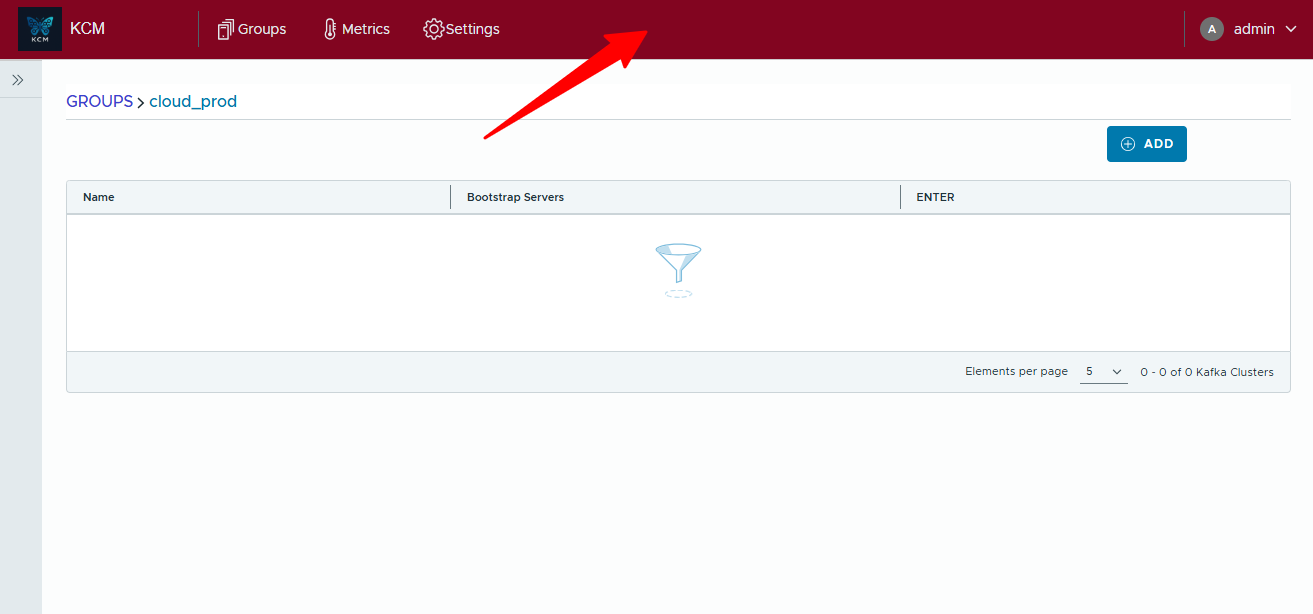
- Open the Groups page.
- Click ADD to create a new group.
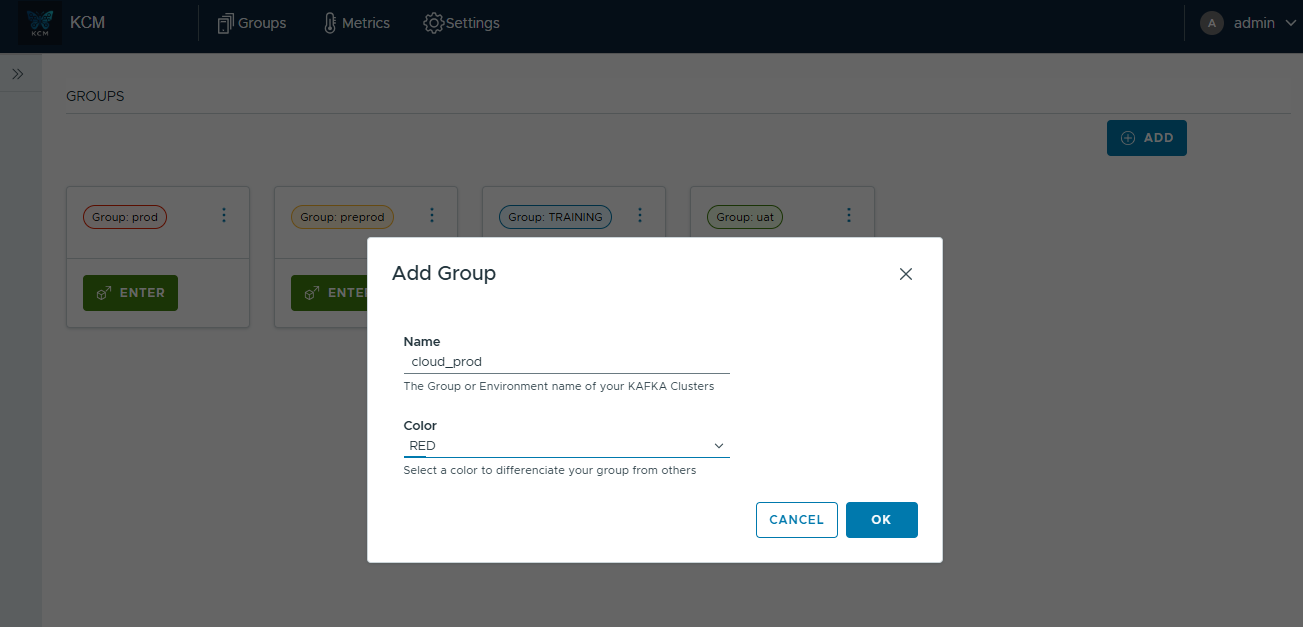
- Provide a name (e.g.
cloud_prod) and select a color. - Confirm, then press ENTER on the new card to open the group workspace.
Register Kafka clusters
Register the Kafka clusters you want to manage inside the group.
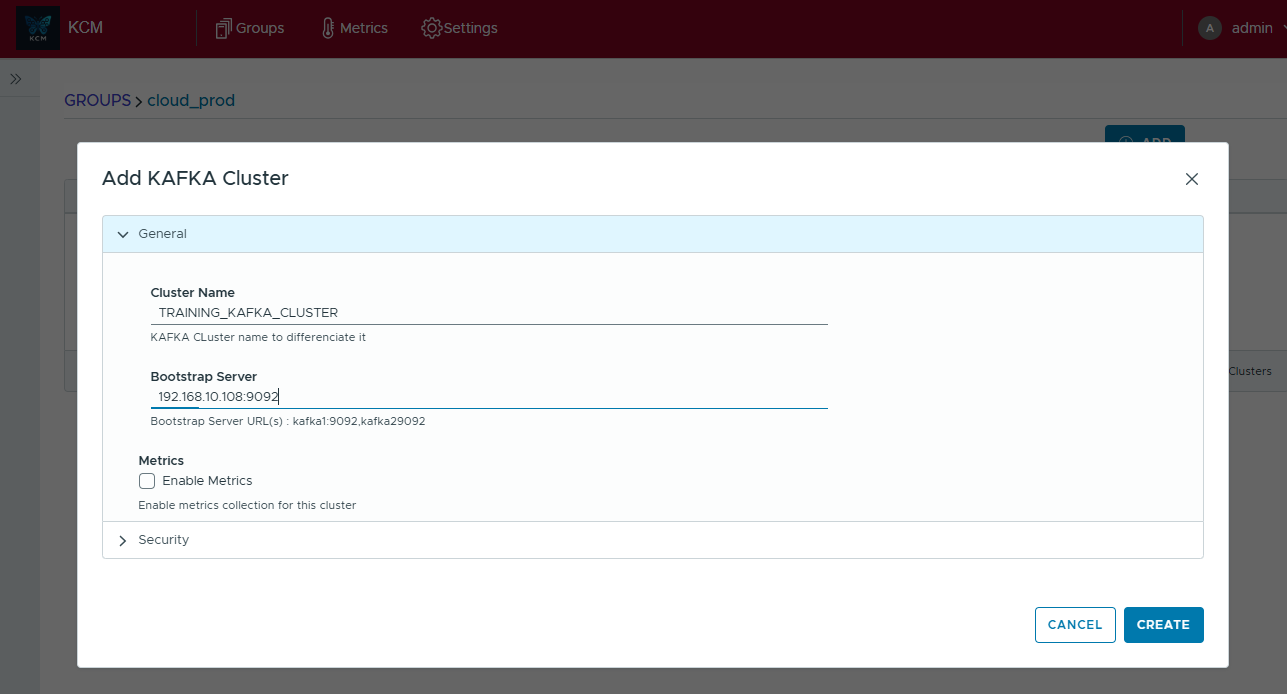
- Inside the group, click ADD to open the wizard.
- In General, give the cluster a name and set bootstrap servers.
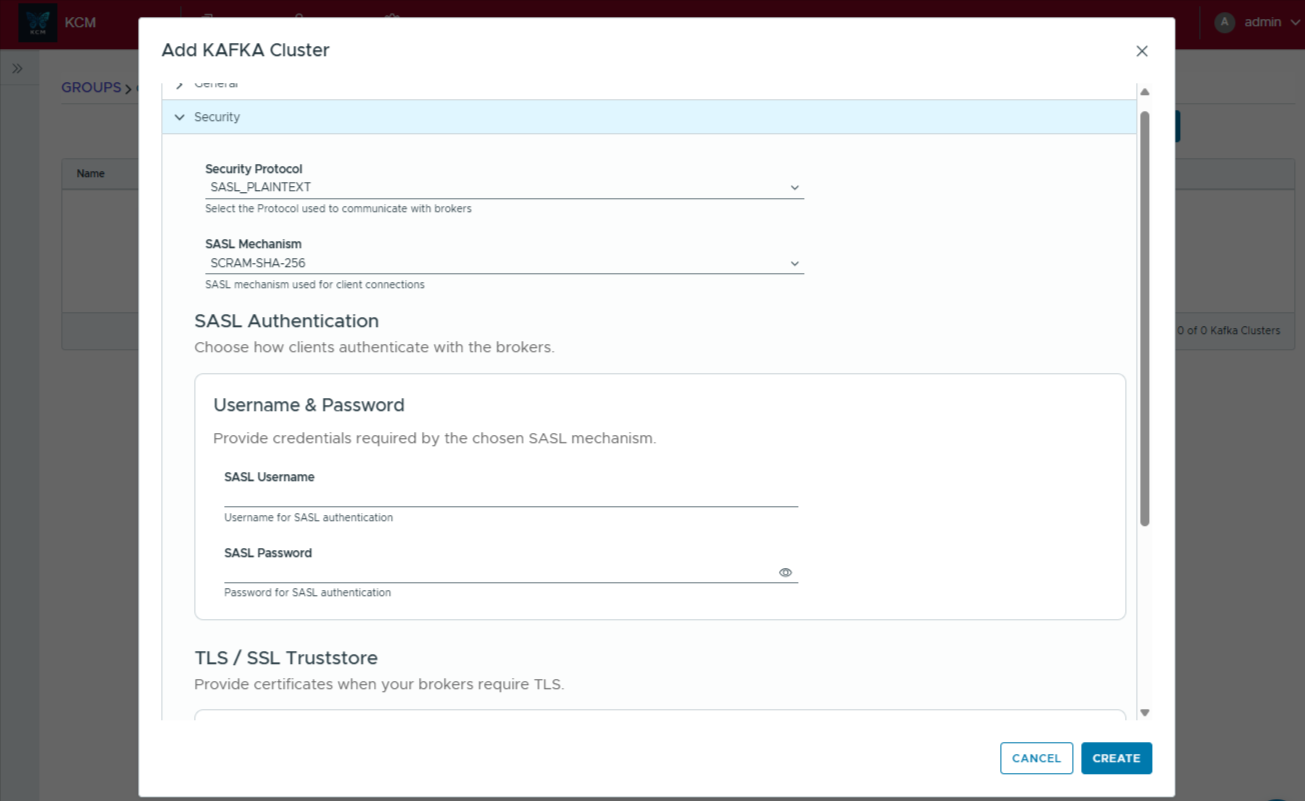
- In Security, select your protocol (PLAINTEXT/SASL/TLS) and provide credentials/certificates.
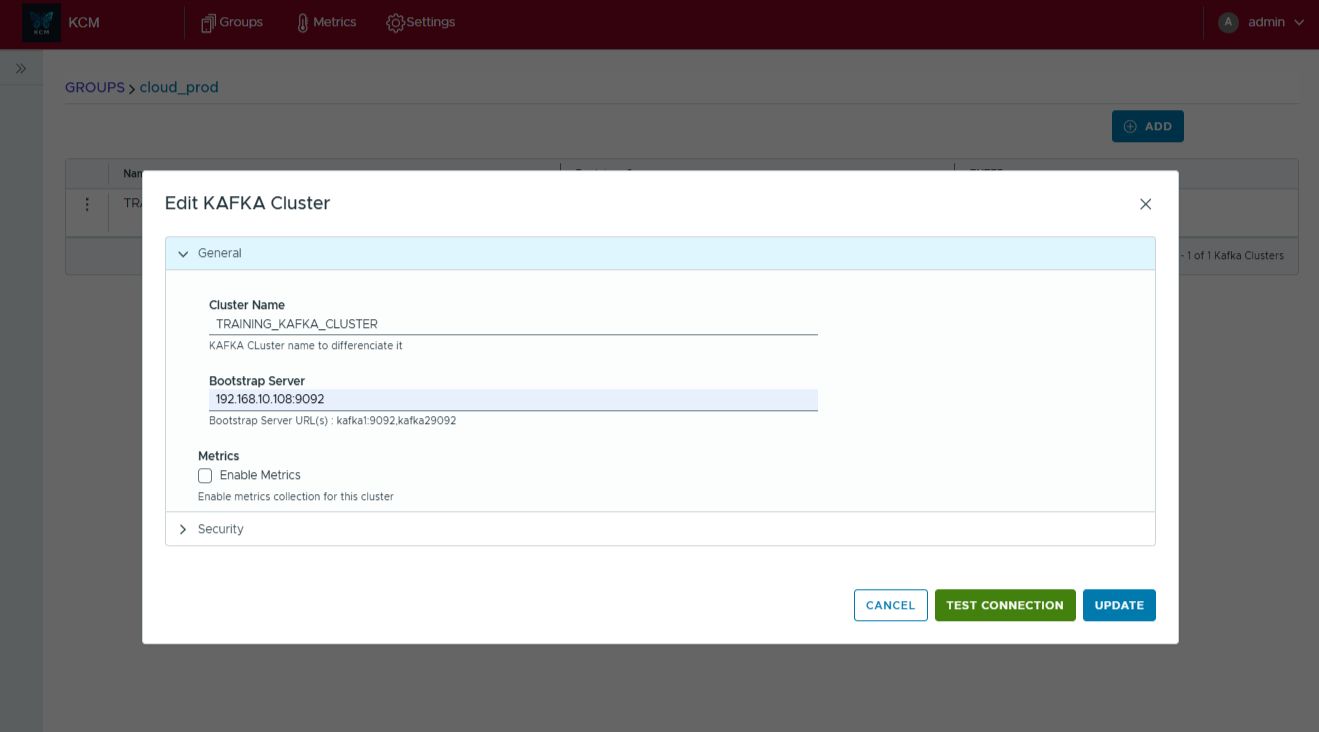
- Click Create, then use Test Connection to validate connectivity.
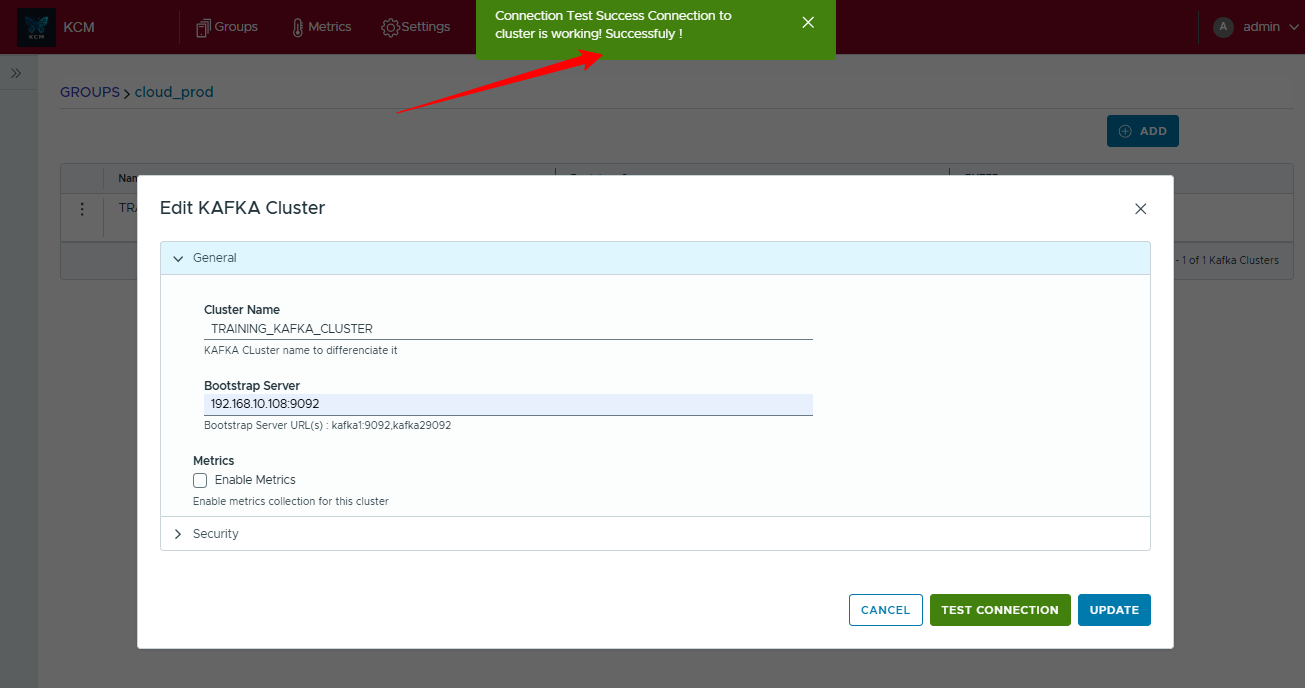
Pro supports up to five clusters. Enterprise supports unlimited Kafka clusters.
3. Explore the web console
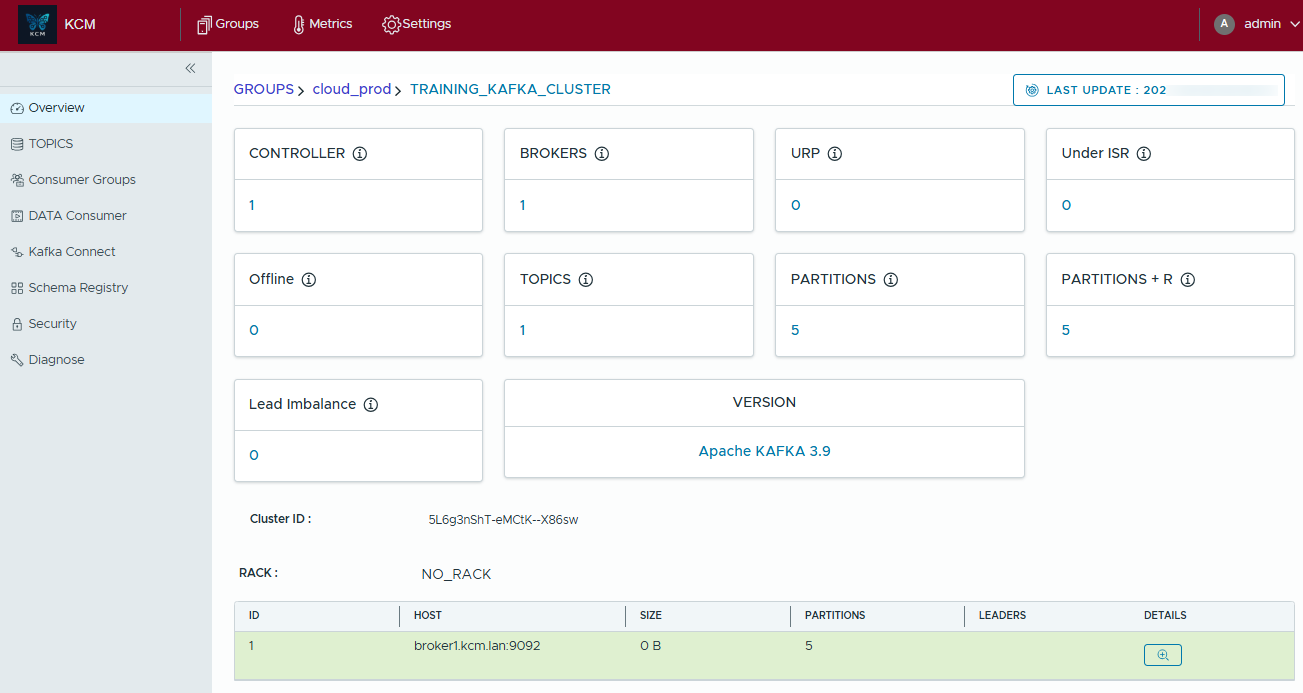
Overview
The Overview tab provides an instant cluster snapshot: controller status, brokers, topics, partitions and Kafka version.
Topics
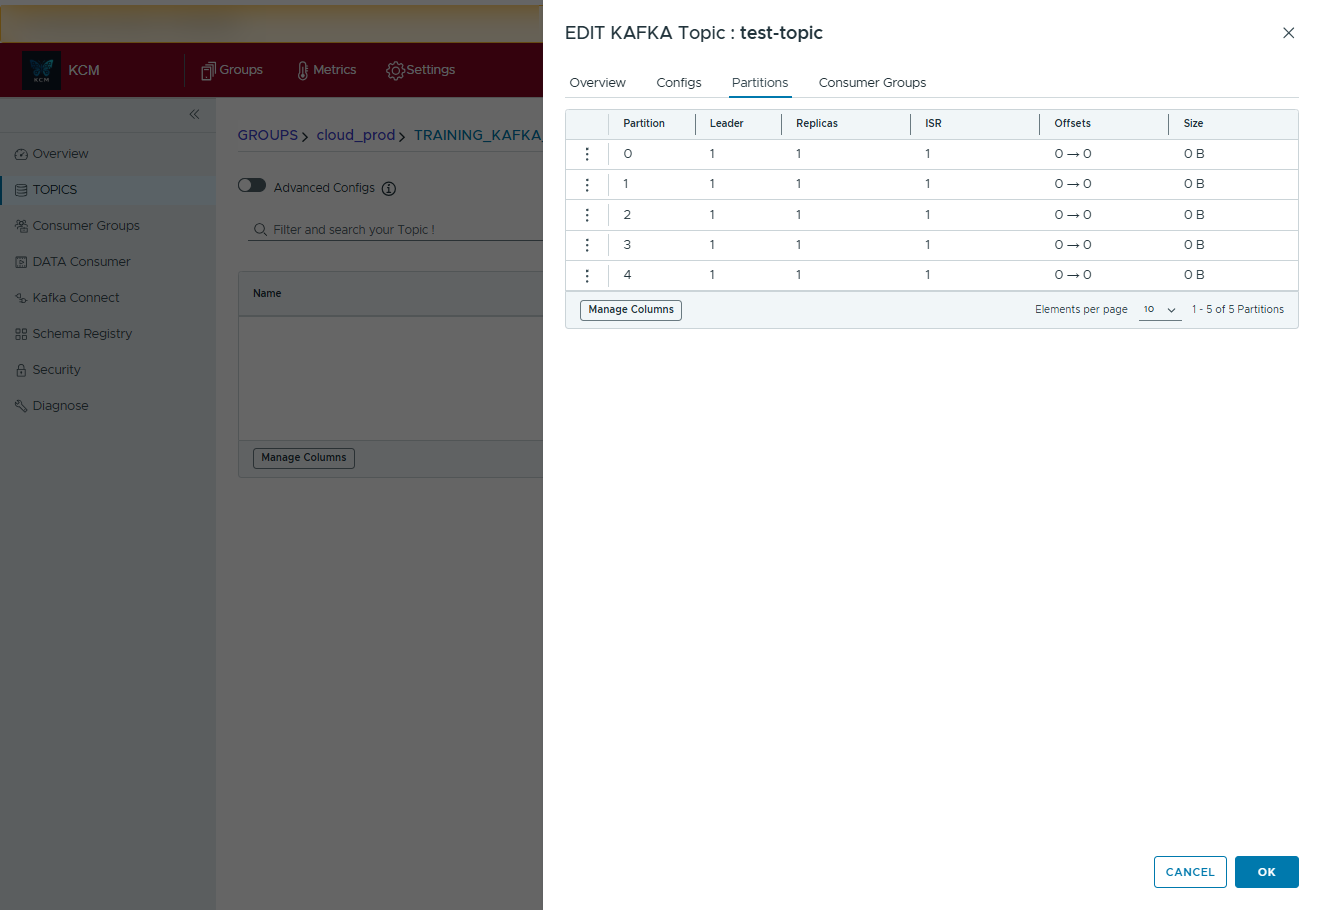
Browse topics, review configs, inspect partitions and ISR, and tail messages without touching the CLI.

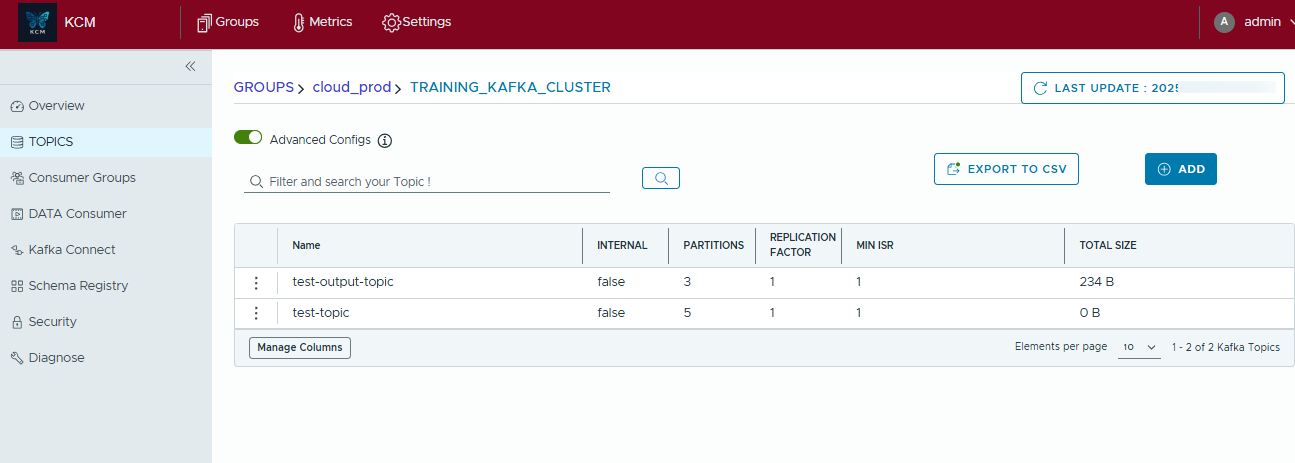
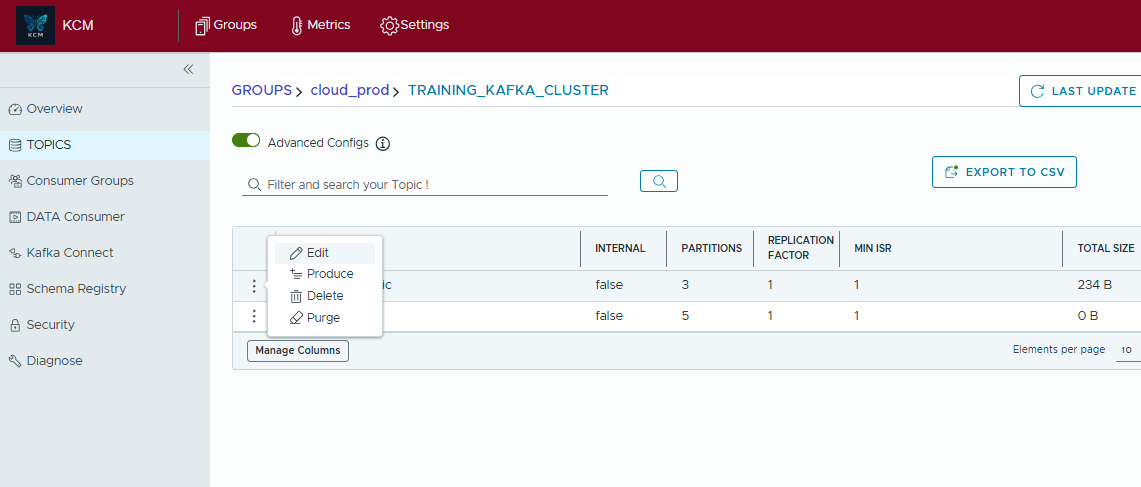
- Create, edit, delete topics
- Purge accumulated data safely
- Export tables to CSV
- Inspect partitions and reassignments

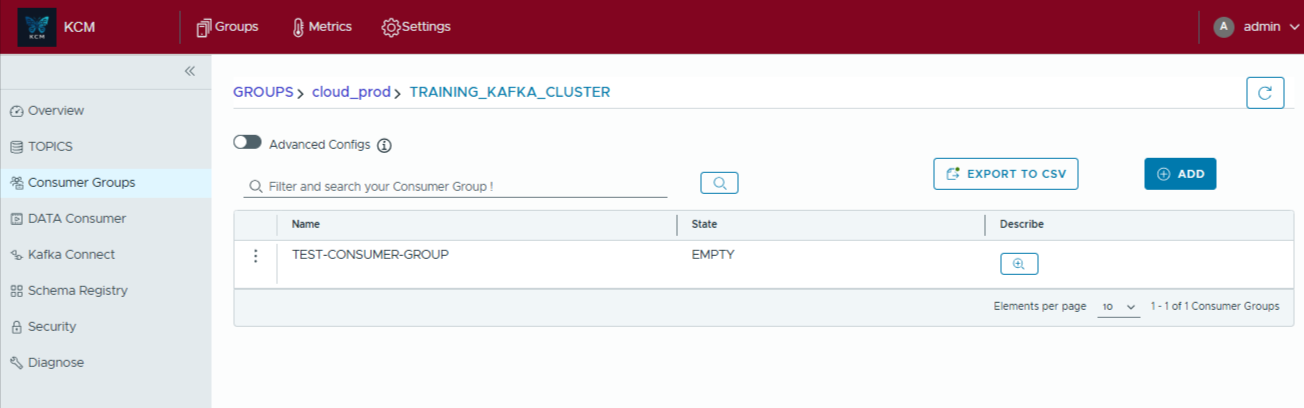
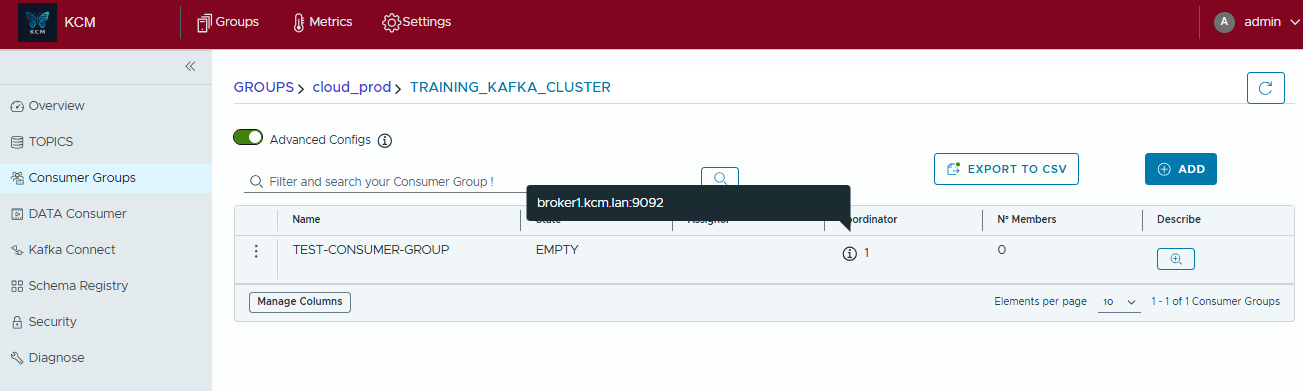
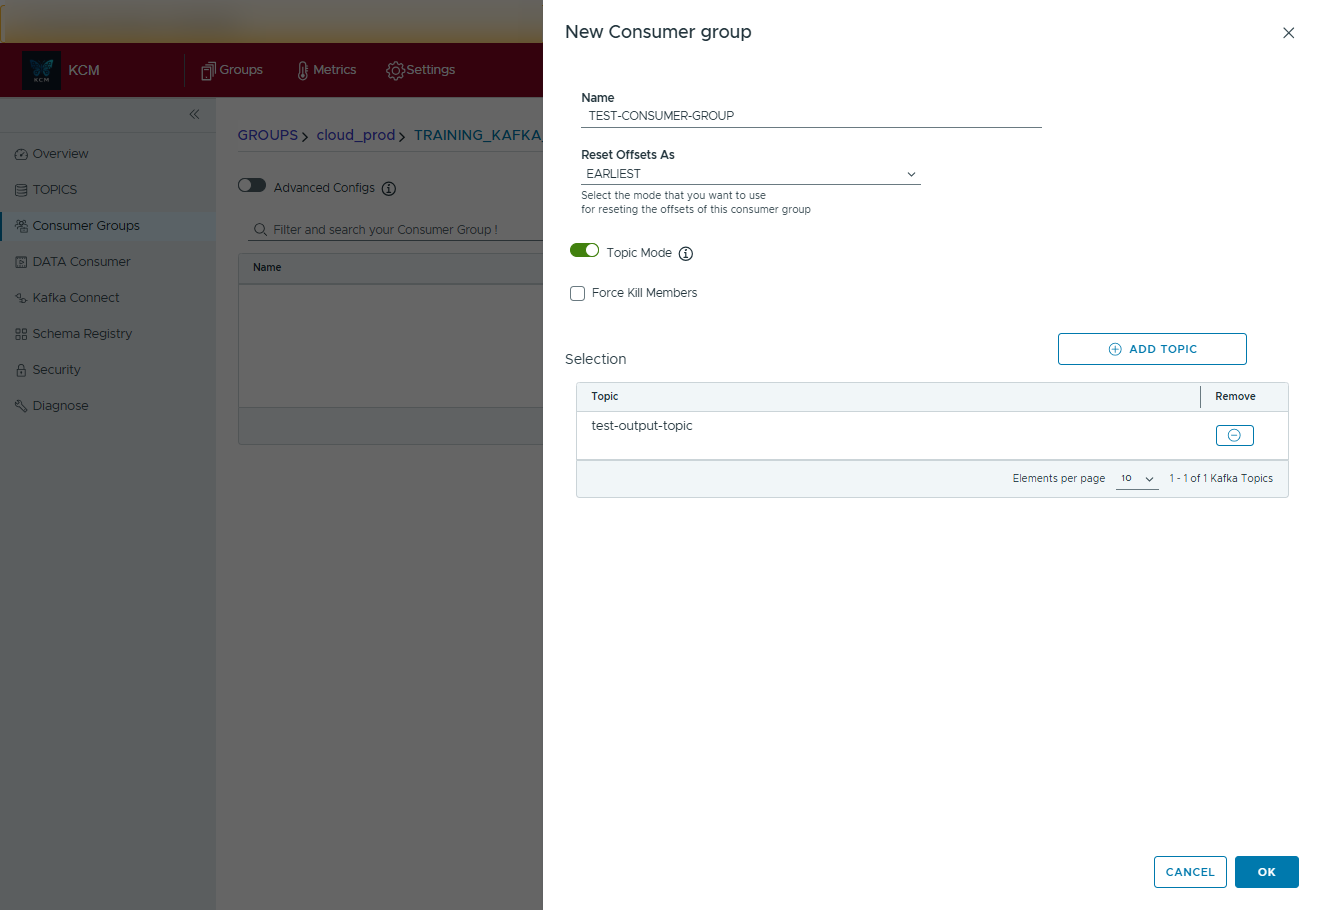
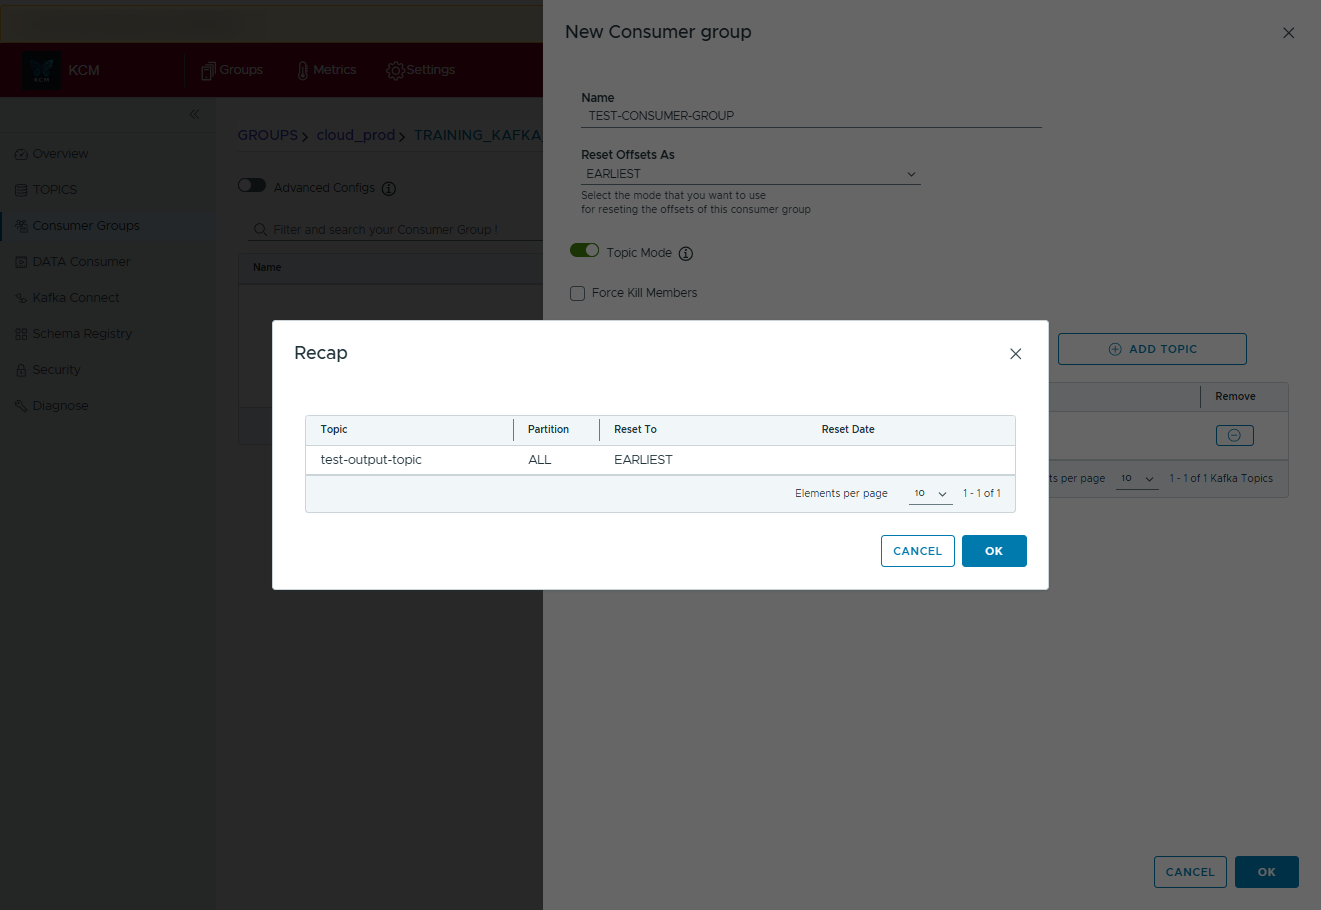
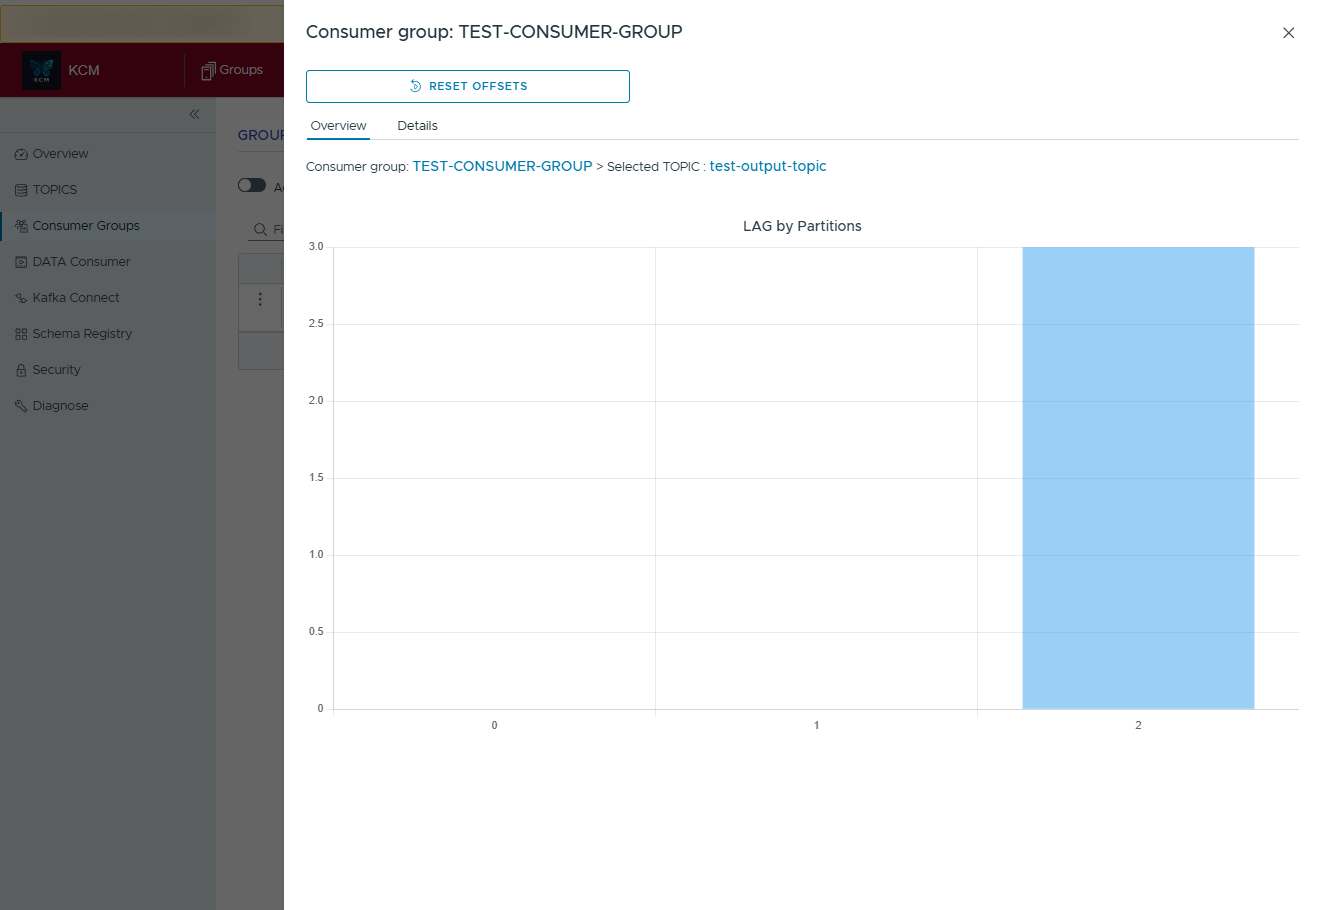
Consumer Groups
Monitor lag, reset offsets safely, and inspect partition-level progress without CLI operations.

Kafka Connect
Deploy, pause, resume, and delete connectors. View connector configs with syntax highlighting and change history.
ACL Management
Create, modify, and audit ACL entries with rollback support. Exporting ACL sets as YAML for GitOps pipelines is on the roadmap.
Cluster Diagnostics
Run health checks, broker config diffs, and scans with remediation guidance.
4. Common workflows
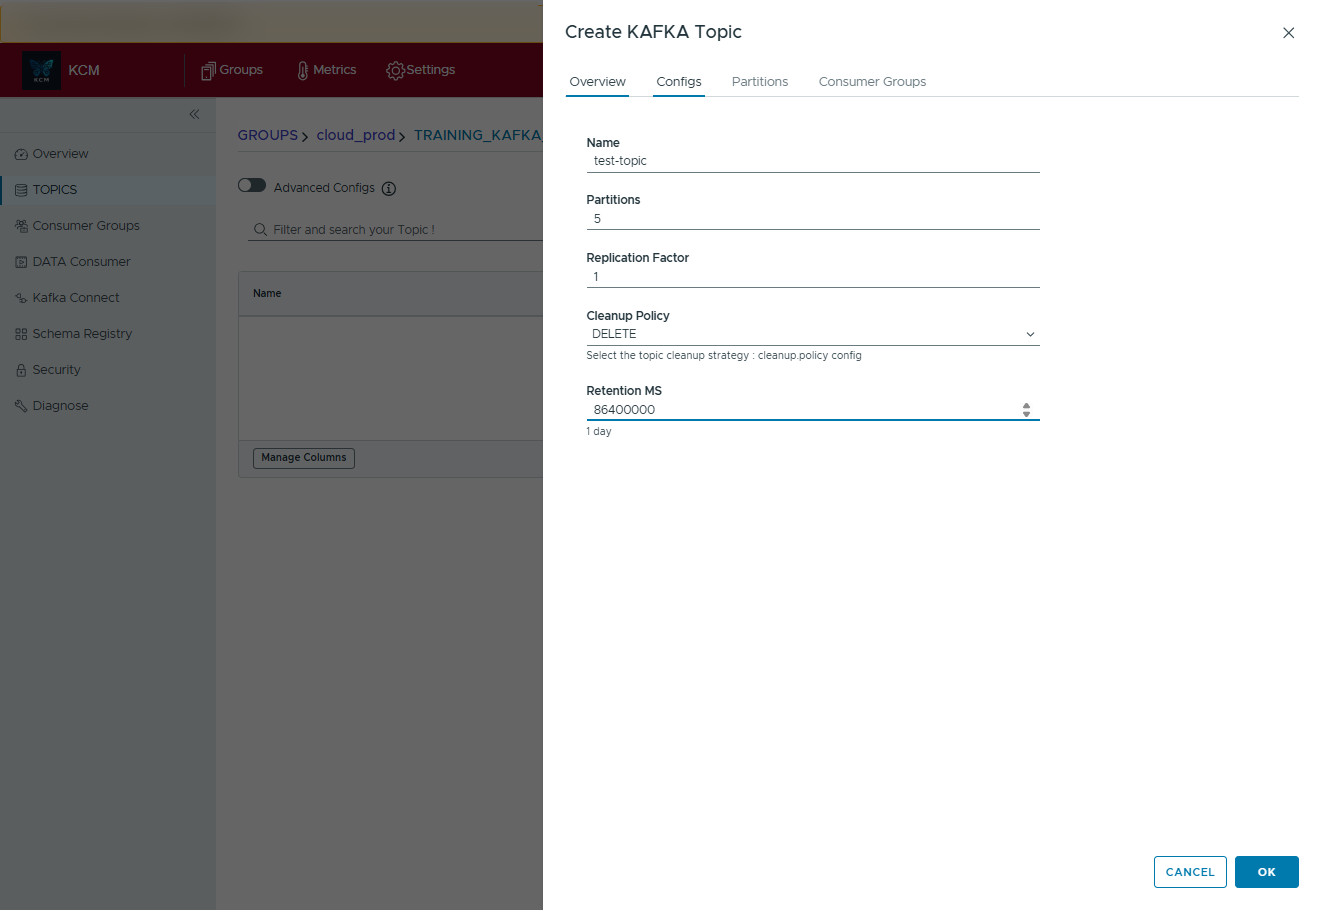
Create a new topic
- Open Topics and click Create Topic.
- Fill in partitions, replication factor, and optional configs.
- Review the summary and confirm. KCM applies settings via the Kafka Admin API.
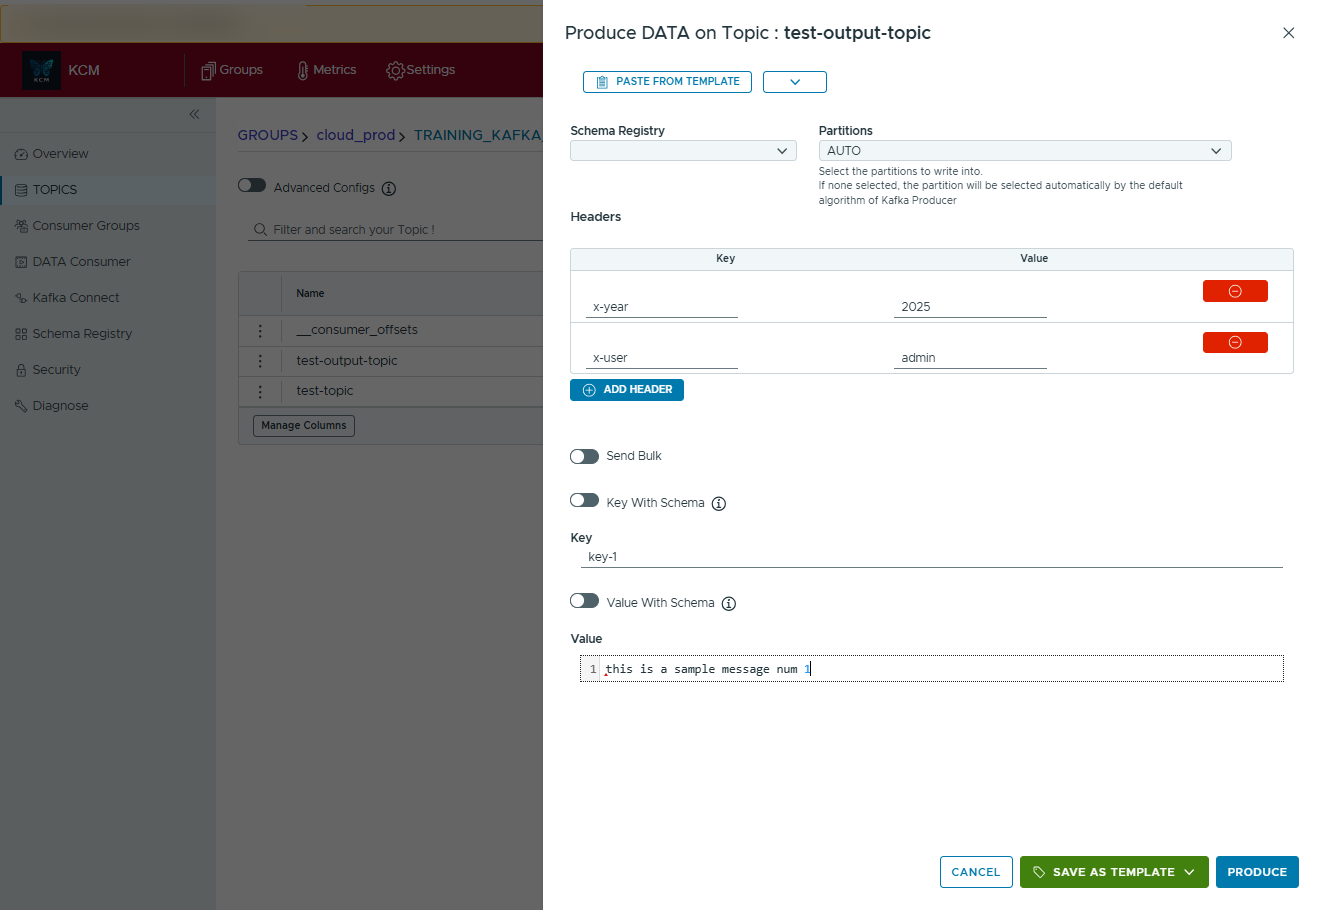
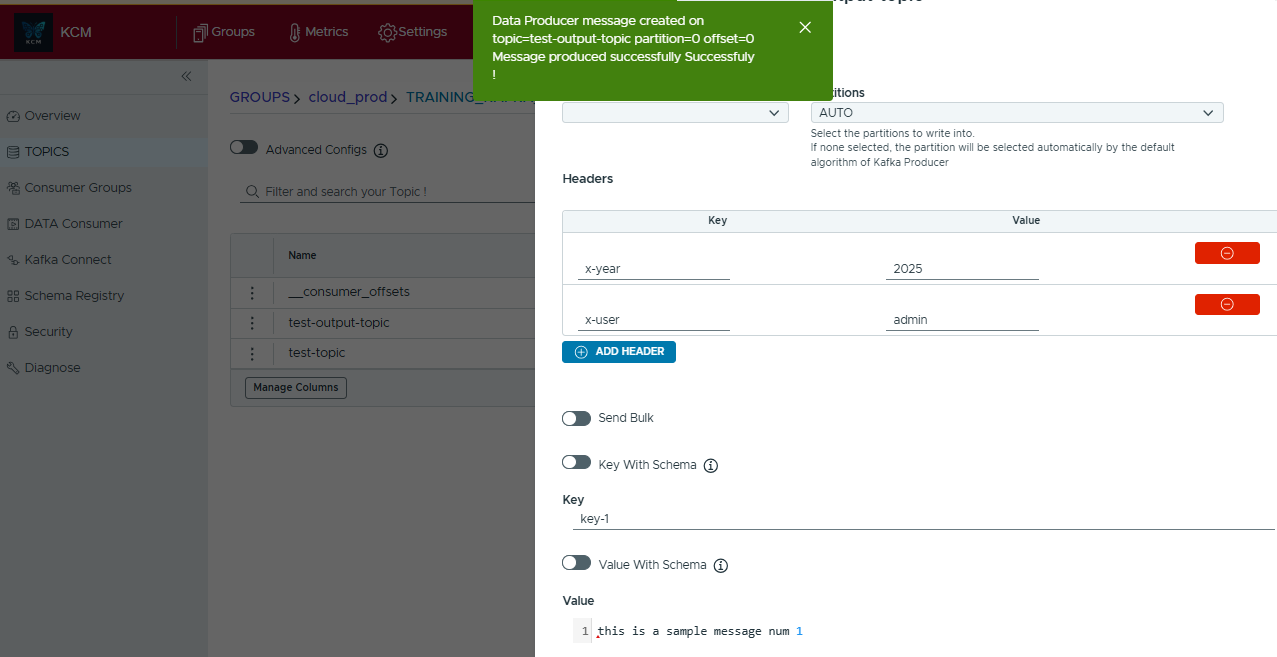
Produce a Kafka message
- In Topics, open the action menu for your target topic and choose Produce.
- Fill in headers (optional), the message key, and the payload value.
- If Schema Registry is connected, enable schema-aware validation for key/value as needed.
- Click Produce. A green toast confirms partition and offset.
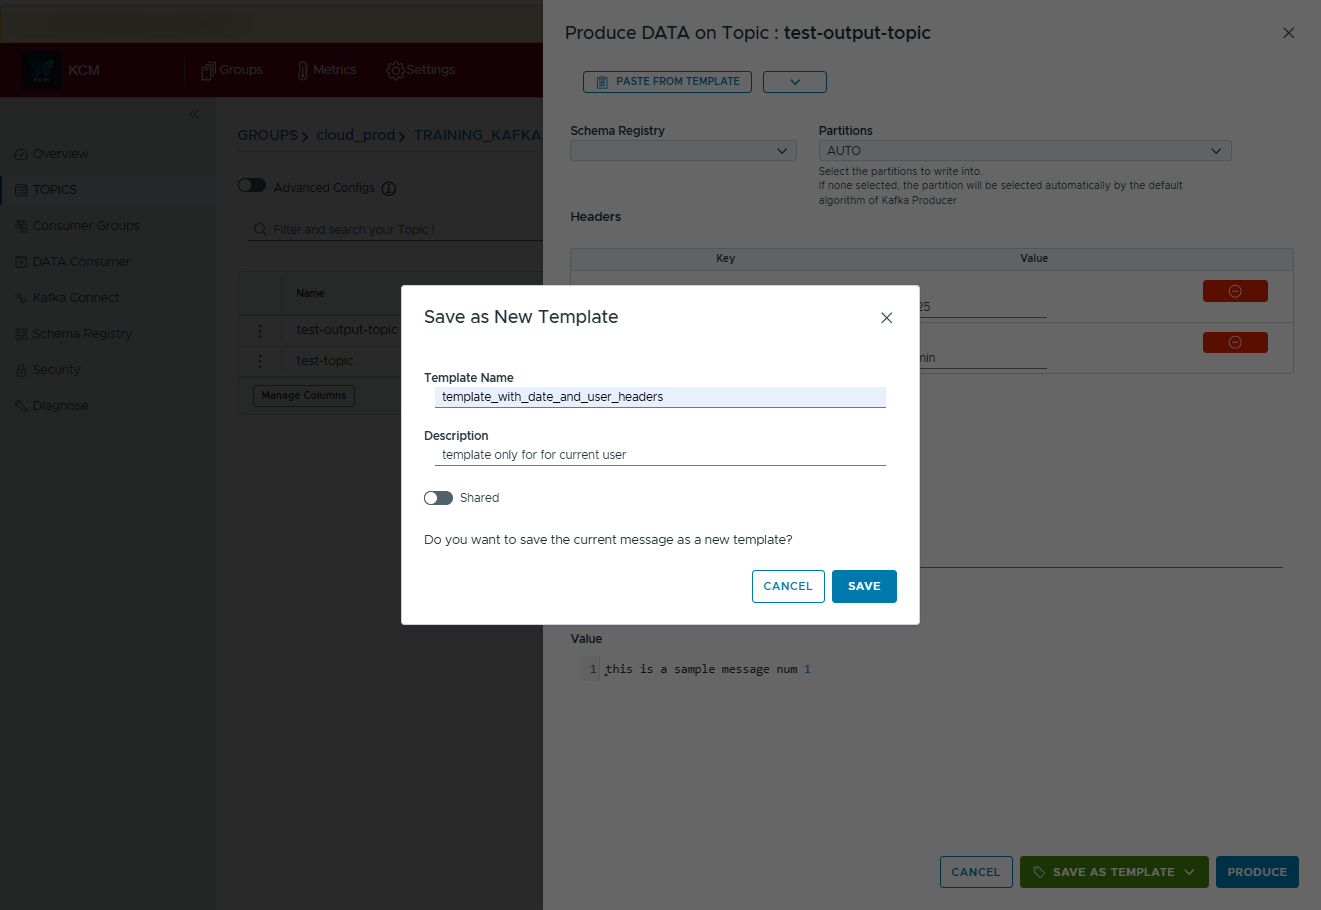
- Use Save as Template to reuse the message later.
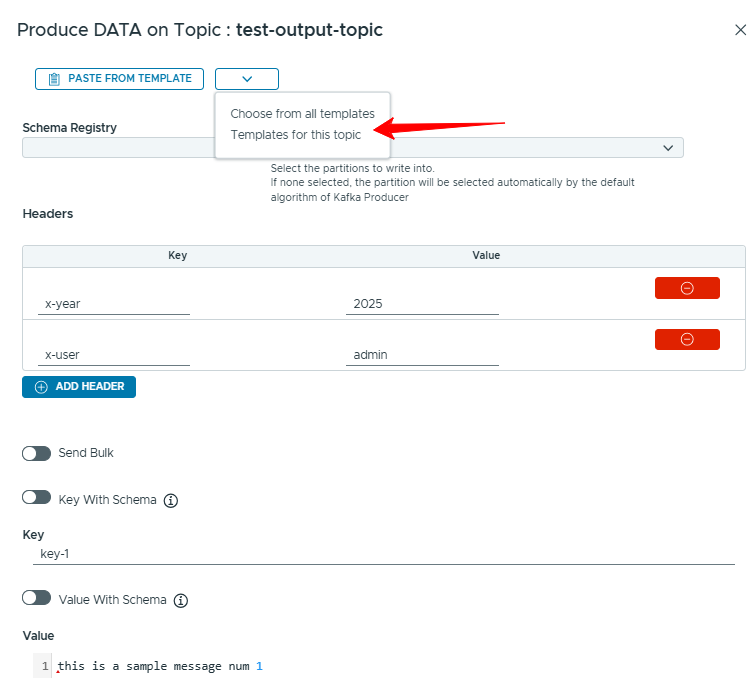
Apply a saved template
- In the Produce dialog, open Paste from template.
- Select a template and click Use this template.
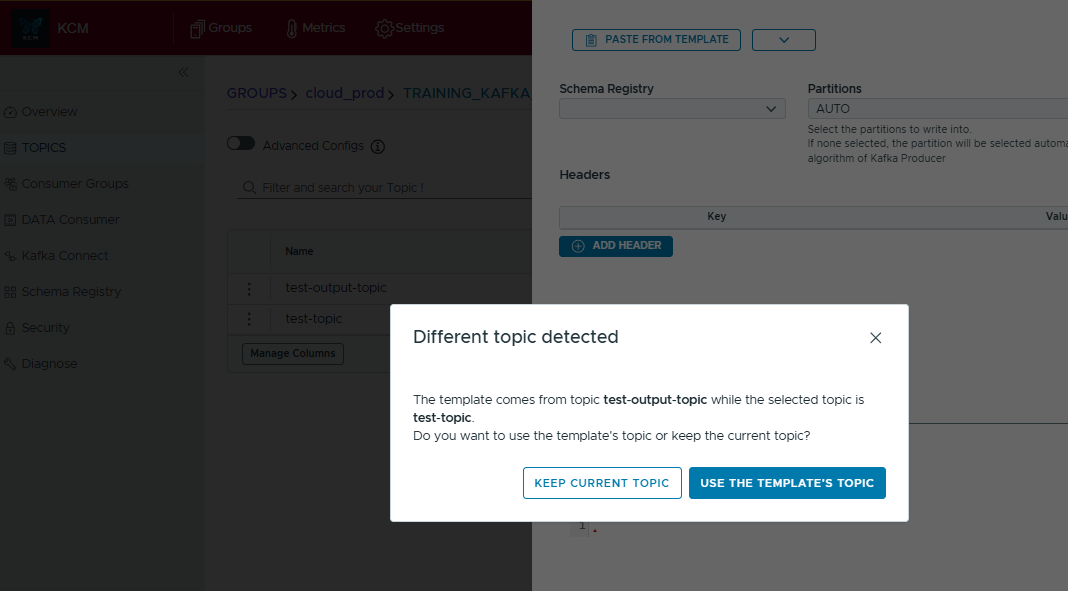
- Confirm topic switching if the template belongs to a different topic.

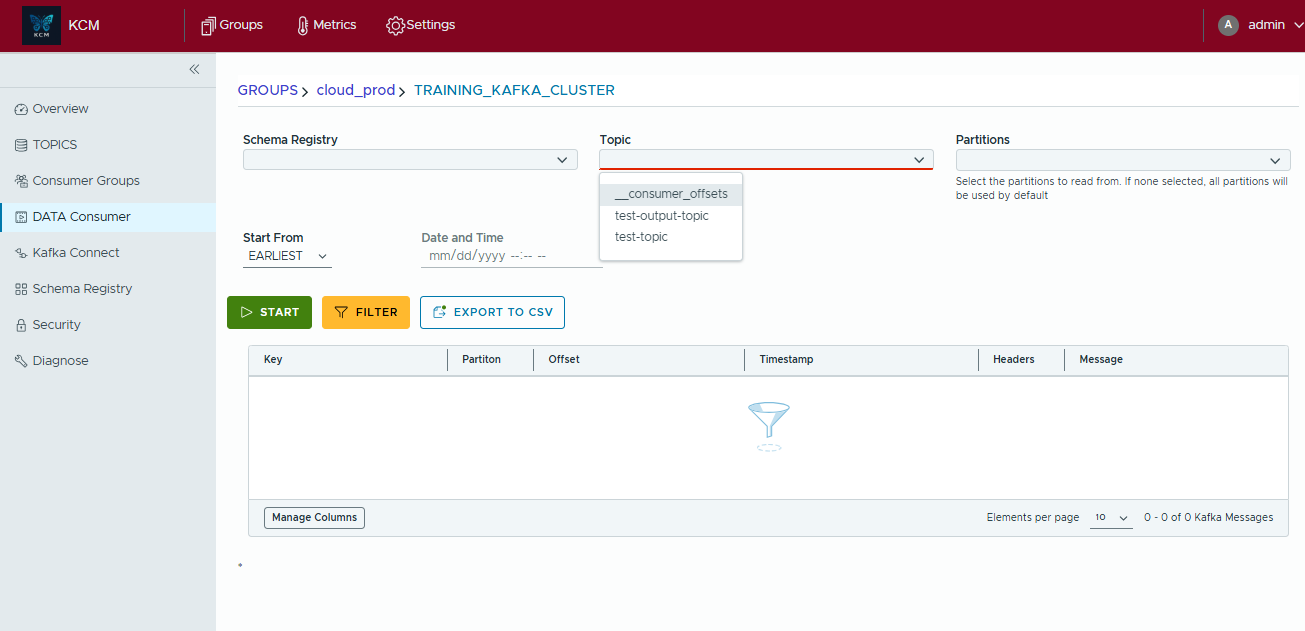
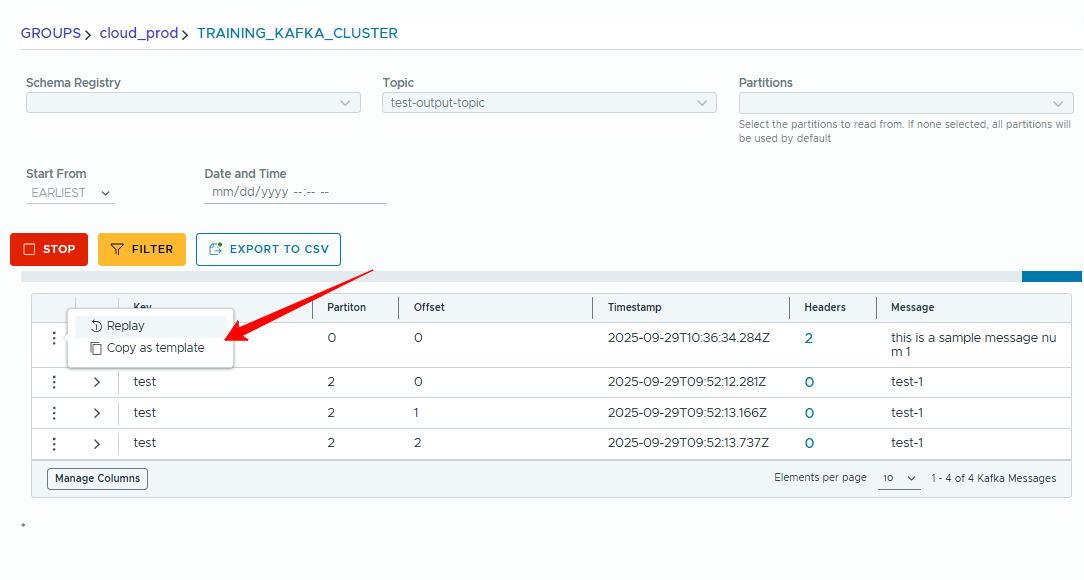
Consume Kafka messages
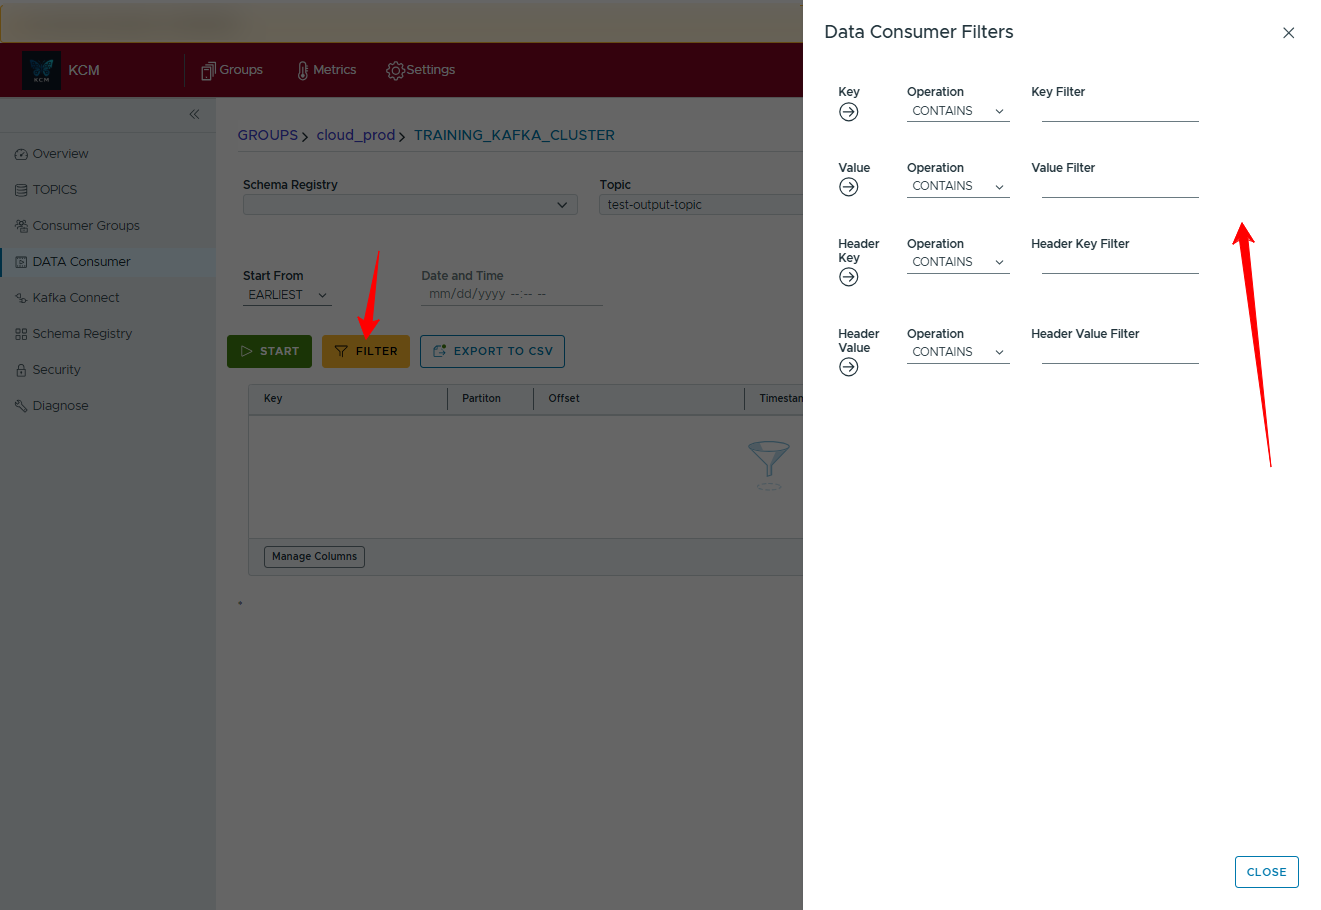
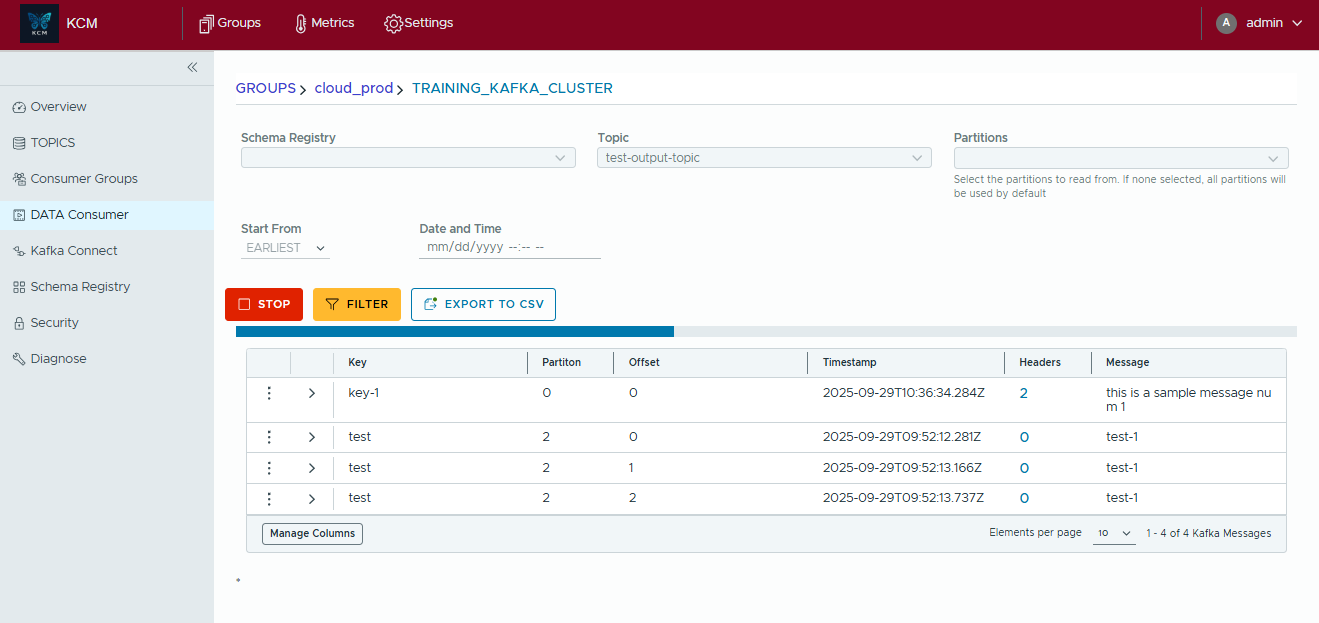
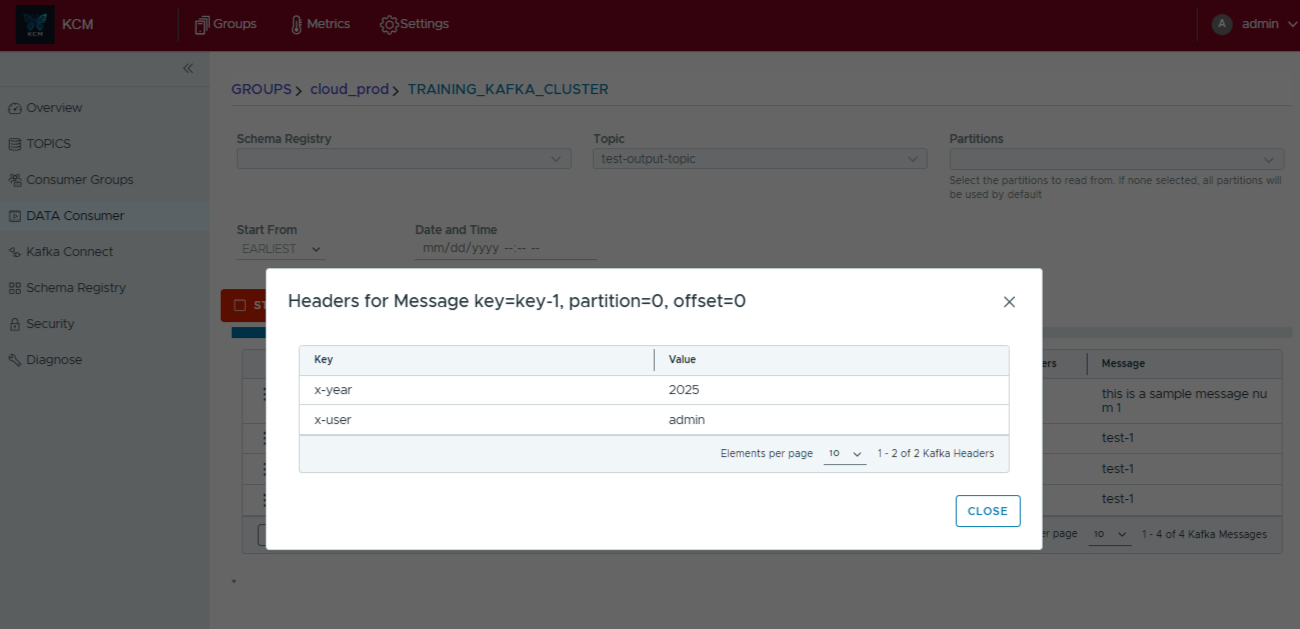
Use Data Consumer to tail records live, filter, replay and export results.
- Open Data Consumer, pick cluster and topic.
- Click Start to stream messages and Stop to pause.
- Apply filters by key/value/headers while consuming.
- Replay interesting messages or copy them as templates.
- Export captured data with Export to CSV.
Deploy a Kafka Connect connector
- Go to Kafka Connect > New Connector.
- Choose the connector class.
- Paste/compose the JSON configuration.
- Validate and launch.
Audit changes
Browse the Audit section to view who changed what. Export audits to CSV or stream them to your SIEM.
5. CLI & automation
A lightweight CLI for scripting routine operations is on the product roadmap. The commands below preview the planned experience.
# List clusters
kcmctl clusters list

# Trigger diagnostics on a specific cluster
kcmctl diagnostics run --cluster prod-eu-1

# Export ACLs to YAML
kcmctl acls export --cluster prod-eu-1 --out acls.yaml
Authenticate with an API token via kcmctl login --token <your-token>. Tokens can be generated in the console under Profile > API Tokens.
6. Troubleshooting
Health checks fail
Verify broker reachability from the KCM host and confirm TLS certificates are trusted.
# Basic network check (example)
telnet <broker-host> 9092
WebSocket (/ws/v1) disconnects
Ensure your Ingress supports WebSocket upgrade and has sufficient timeouts.
# Inspect ingress annotations
kubectl -n <ns> describe ingress kcm
Connectors not visible
Ensure the Kafka Connect REST endpoint is reachable and your service account has the right permissions.
“Unauthorized” errors
Review RBAC assignments under Admin > Access Control. Each module has granular permissions.
Log locations: Application logs are available via container stdout (Docker/Kubernetes).
Enable debug mode with KCM_LOG_LEVEL=debug for deeper tracing.
7. Need help?
We’re here to help you succeed with Kafka.
- Email: support@kcmhub.io
- Community: GitHub Discussions
Kubernetes version/distribution (if applicable), Ingress class/controller, KCM version, and relevant logs.